On this page
1. Download the packaging template and extract it to a directory you think is appropriate:2. Unzip the software installation package:3. Place the application files in the appropriate location4. Edit the linglong.yaml file5. Add desktop startup shortcuts and application icons6. Build and debug the application7. Export the layer installation packageContent transferred from the community forum by mozixun | Original link
This tutorial is suitable for AppImage/applications built using the Electron framework that require little additional dependencies.
You can also add a little more
Before starting this tutorial, we must first understand how the Linyaps container works. Here I use a picture to explain
Only after understanding the difference between how deb/rpm applications and Linyaps containers work can we have a clear understanding of the explanations later in this article.
The difference between the first-level package manager and the second-level package manager can be found in my previous post: https://bbs.deepin.org.cn/post/276254
Before formally talking about how to convert, first, let’s briefly describe the concept of the variable XDG_DATA_DIRS (for example, I installed Linyaps version QQ and HMCL and deb/rpm version of QQ Music and Discord, then the directory under XDG_DATA_DIRS will probably look like the following )
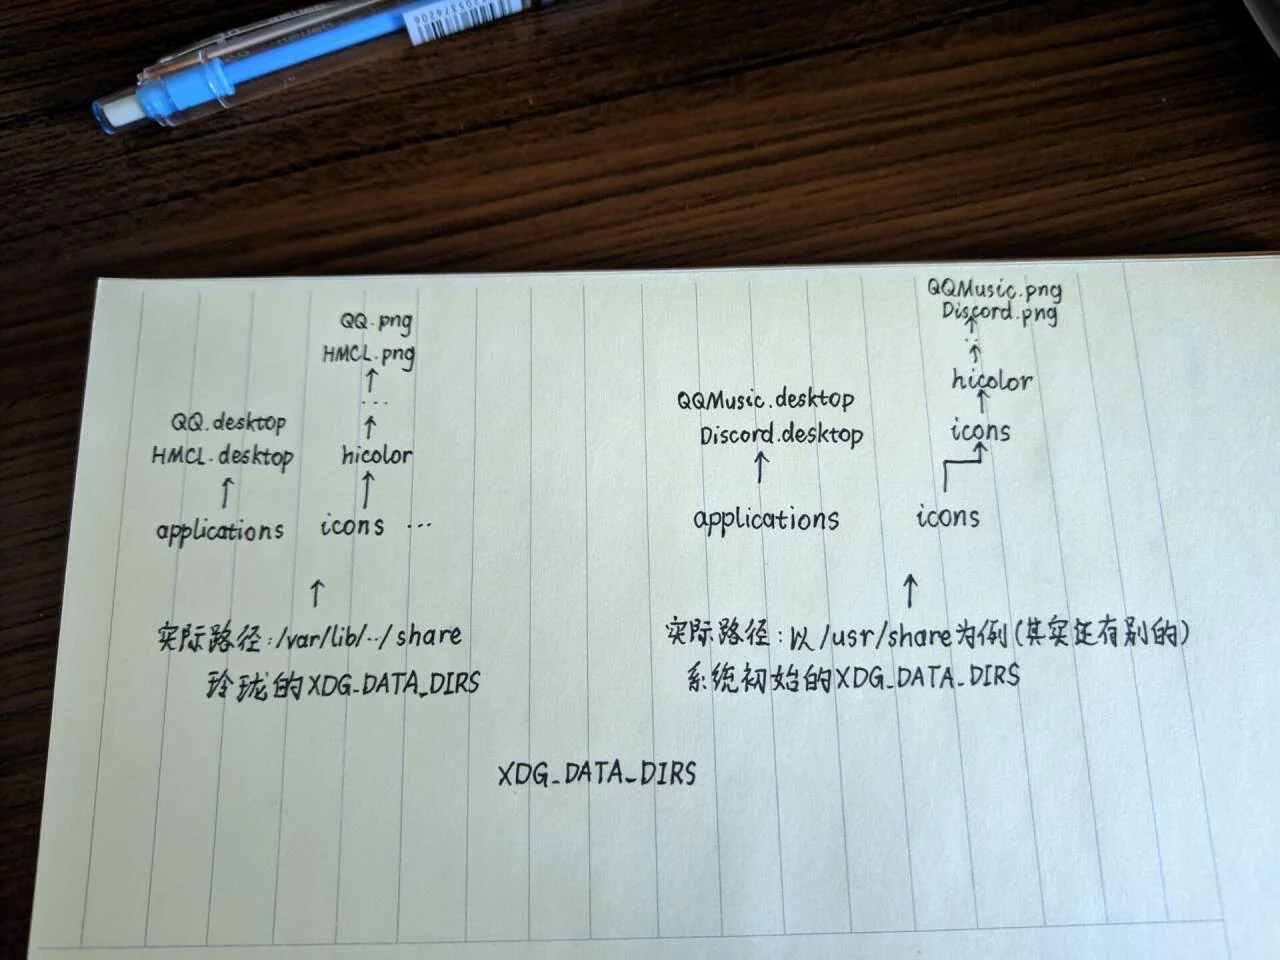
Then the application shortcuts are placed under XDG_DATA_DIRS/applications to indicate how to start the application And what other things can be done (such as using it to open some files, etc.)
Then as shown above, the system launcher (such as KDE Plasma application launcher and GNOME global menu) will Traverse all directories under XDG_DATA_DIRS Find the corresponding shortcuts and application icons; take the above picture as an example (and the desktop file is configured, I will write about how to specify the icon later. ), then the launcher will be in Find the .desktop shortcuts corresponding to QQ and HMCL and the icons specified by the desktop shortcuts in the XDG_DATA_DIRS marked by Linyaps and display them. Find the .desktop shortcuts and the icons specified by the shortcuts corresponding to QQ Music and Discord in the system default XDG_DATA_DIRS (such as /usr/share) and display them.
Having said this, I will use the following figure to show the running environment of the application in Linyaps ( Both the application that initiates the request and the application that processes the request are Linyaps, and the runtime used by the browser and the application is different. ) and the difference between applications installed directly using deb/rpm (application Call using xdg-open command to open ys.mihoyo.com as an example )
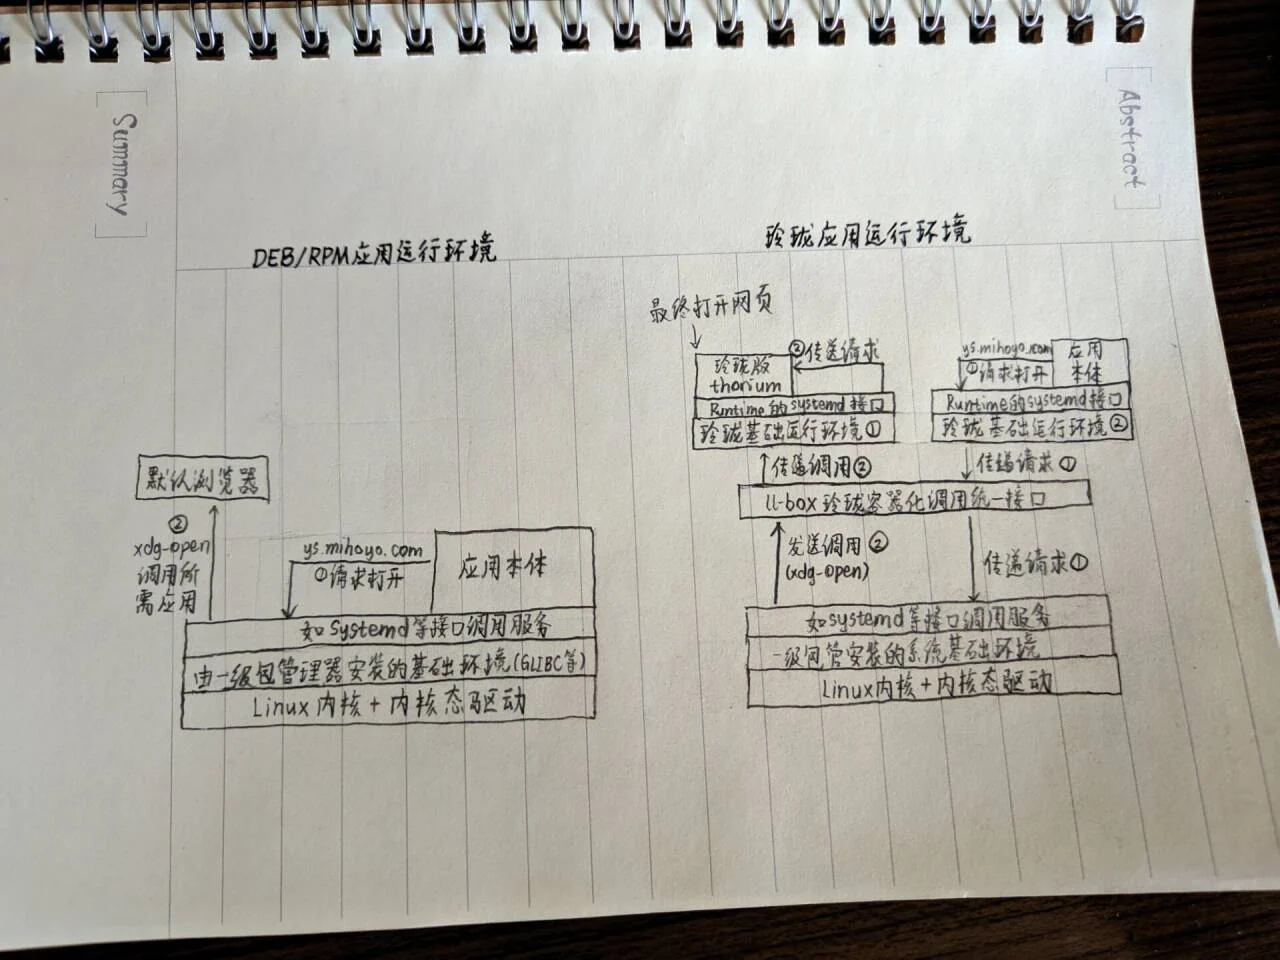
After having a certain understanding of the call forwarding mechanism within the Linyaps application, it is not difficult to understand that there are three main points in Linyaps packaging:
1. There must be an application executable files 2. There must be application shortcuts and corresponding icons under XDG_DATA_DIRS in Linyaps 3. (Partial applications) must be able to respond to (file/webpage) calls
Then the following packaging tutorial will take the realization of these three points as the specific goal ( I take motrix as an example )
1. Download the packaging template and extract it to a directory you think is appropriate:
Sample download address: https://gitee.com/LFRon/linyaps-packaging-guide/releases/download/1.0/com.id.linyaps.tar.gz
2. Unzip the software installation package:
.deb tutorial: https://blog.csdn.net/qq_34825514/article/details/124311711
.appimage decompression tutorial (just add –appimage-extract when executing):
/xx/app.appimage --appimage-extract
3. Place the application files in the appropriate location
First enter the folder where you unzipped the template, and then enter linglong/sources
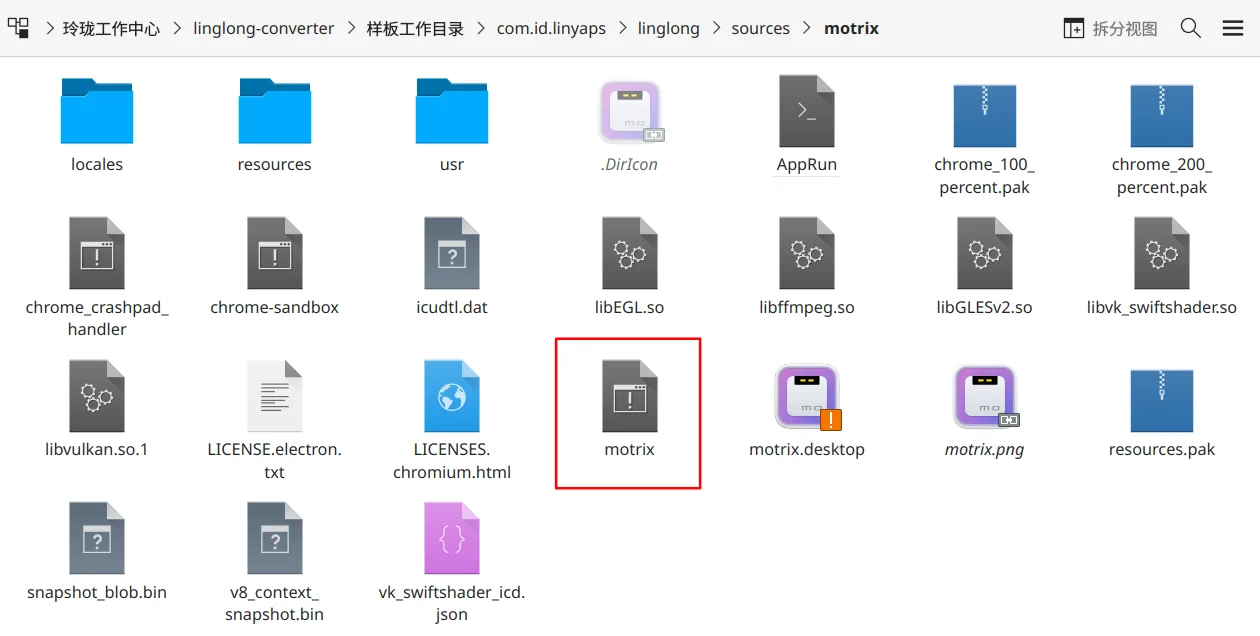
The software itself you get after the second step (maybe in a messy location such as /opt/xx or /usr/lib after deb decompression), Directly replace the folder itself , for example, now I decompressed motrix.appimage in the linglong/sources folder and got the application files under the red box: 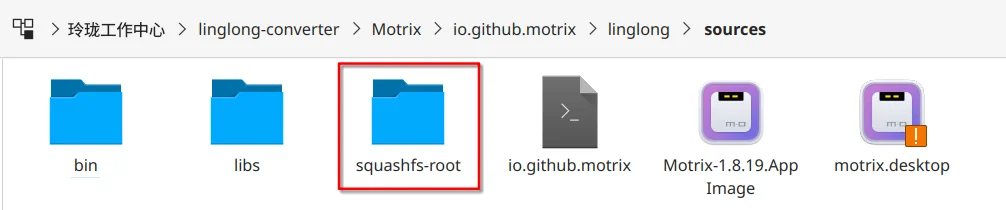
After opening, it looks like this:
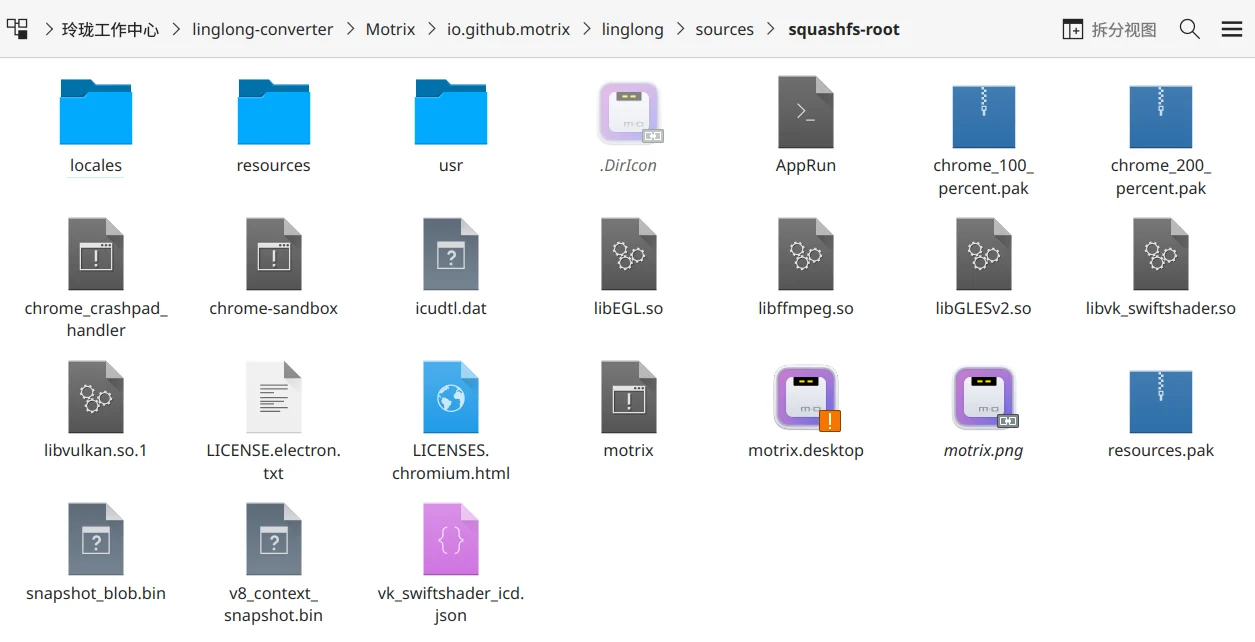
Then copy squashfs-root (or other folders you obtained through a similar method) to linglong/sources Used to replace your_app folder and rename it to the folder name you want. For example, I renamed the folder where the motrix application files is located to motrix. After the operation, the linglong/sources folder will become the following structure
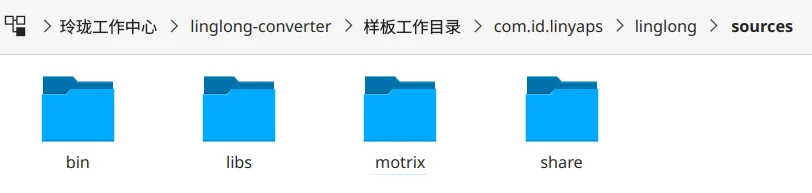
Finally Determine which executable file the program is , taking motrix as an example, we found that there is no need to execute AppRun to directly execute the motrix binary file to start it directly, so we Learned that the command to start it in this folder is ./motrix
4. Edit the linglong.yaml file
After returning to the project directory, the editing method of linglong.yaml file is as follows:
Let’s look at the front first:
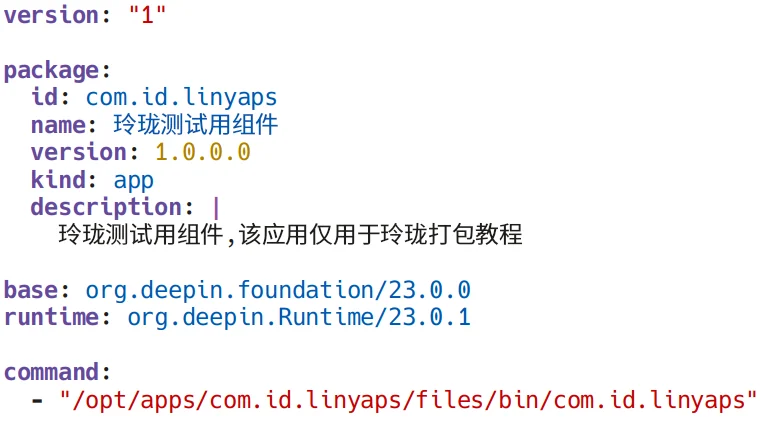
The id corresponds to the Package: line in the debian/control file of the deb package, is the application’s unique identifier , and name is on the Linyaps store Displayed application name
description is the introduction of the application
Secondly, in the basic operating environment, The base (basic environment) used must be declared , the runtime (that is, the runtime library) used does not need to be added. For Electron applications such as motrix, it is enough to use org.deepin.base as the base. Then the runtime can be deleted and become like this:

Next, in the command command, change the words "com.id.linyaps" Change to the id you set yourself is enough. The reason why it is not executed directly in the command is because Linyaps will automatically adjust the command line when packaging and identifying the application. No manual intervention is required. The packager only needs to adjust the package name in the command. And you can add some other parameters to the custom script to adapt to the Linyaps environment or add new functions
Let’s look at how to write the build script below
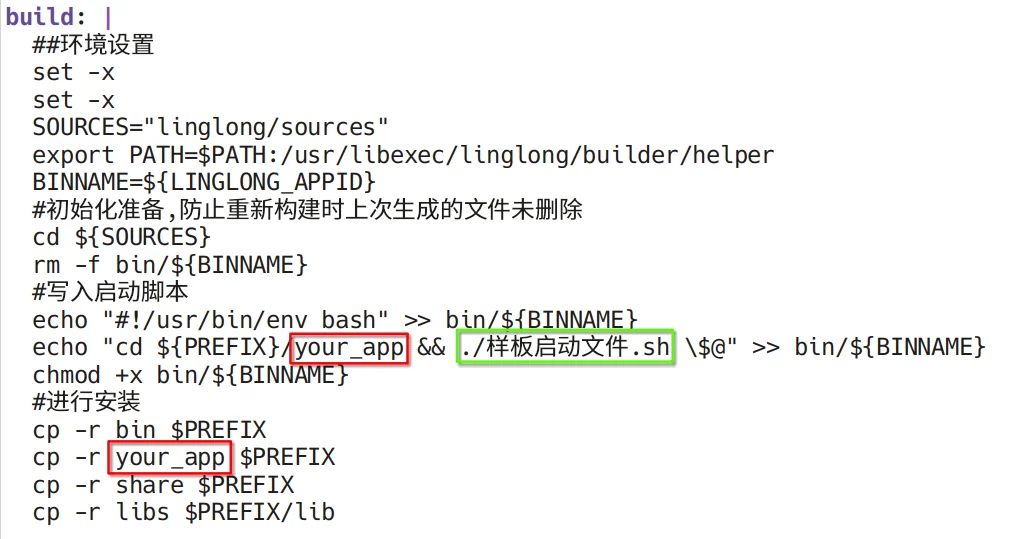
First change the red box to the name of your application folder, I changed it to motrix in the case, so just change the content in the red box to motrix in the case
Since we have already known that motrix’s appimage installation package is designed to execute motrix directly after entering the program’s main folder, we can directly change the “./sample startup file.sh” in the green box to execute motrix, as shown below: 
Of course, if you want to open Electron’s Wayland session, you can also change it as shown below (but the current Electron Wayland display protocol version is not mature and is not recommended):

Then in the end, the build script was changed to the following picture: 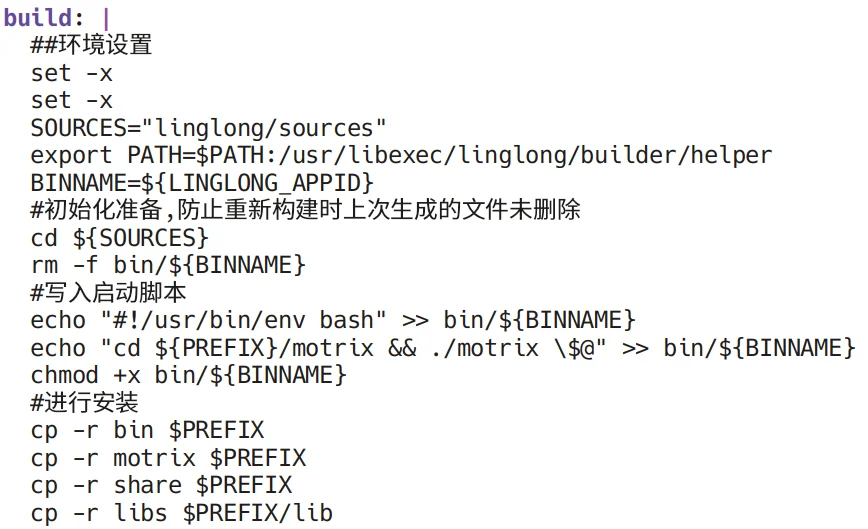
5. Add desktop startup shortcuts and application icons
After the main part is completed, the only thing left is to enable the application shortcut to run the application normally and display the icon normally
So let’s start by modifying the desktop file
First, find the .desktop shortcut from the deb installation package and the appimage decompressed file, and then Copy it to your working directory/linglong/sources/share/applications folder and then open it , you will see: 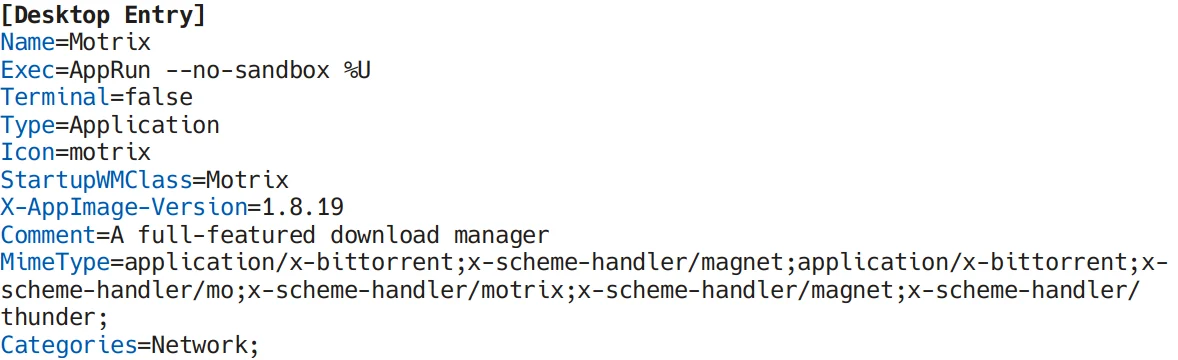
Then, X-AppImage here is specially provided for AppImage. It can be deleted if it is not used here. Apart from this, the remaining important attribute functions are as follows:
Name is used to set the application name that will be displayed in the startup menu
Categories is used to set the type of folder in which shortcuts for this application will be placed. (As shown in the picture, it will be placed Network Application)
Exec is used to set what command will be executed after you double-click it.
Icon is used to set it Which icon to display , If you only set the application name as shown in the picture, the desktop environment will automatically look for pictures corresponding to that name (excluding the suffix).
So here we mainly need to set the two attributes Exec and Icon.
Exec only requires Fill in what should be executed after entering the container. The previous Linyaps will be automatically added when generated. , since our startup script is placed in 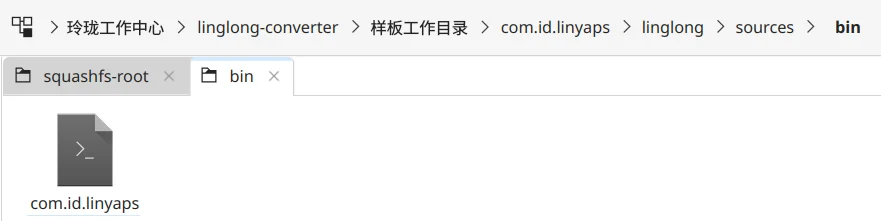
The corresponding path in the container is (I took this screenshot after executing ll-builder run –exec bash in advance) 
So we can fill in the Exec path as shown below

Then we can directly fill in the image with the name you want ( Do not fill in absolute paths ), for example, I fill in motrix here:

Then we save the desktop file to complete editing the desktop shortcut
Then let’s talk about how to place the corresponding application icon
Since we have set the Icon to motrix before, the icon can be placed as follows:
First find the icon you want to set for the application. For example, I found this:
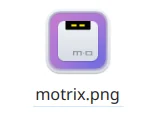
Then I opened it and found that it was 512×512 pixels:
Note here: Taking KDE Plasma as an example, the launcher only supports a maximum of 512×512 pixels. Do not make the image resolution too high. 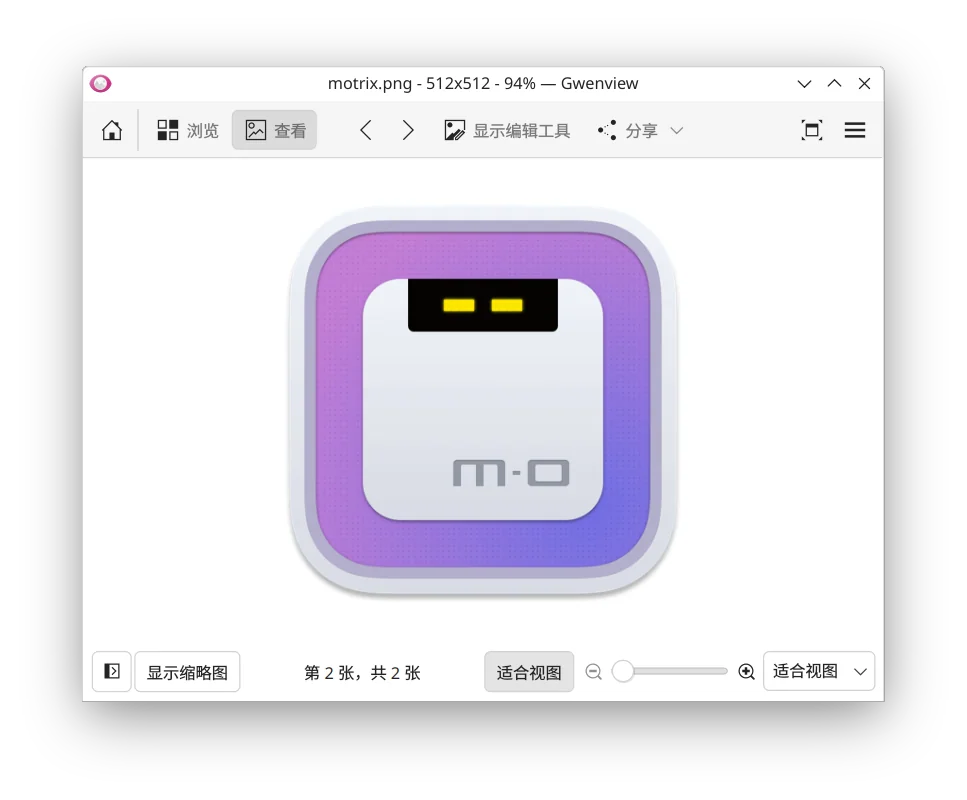
So we Return to the working directory/linglong/sources/share Below Create a new folder like this :
mkdir -p icons/hicolor/512x512/apps
Then open the file manager and the effect is as follows:
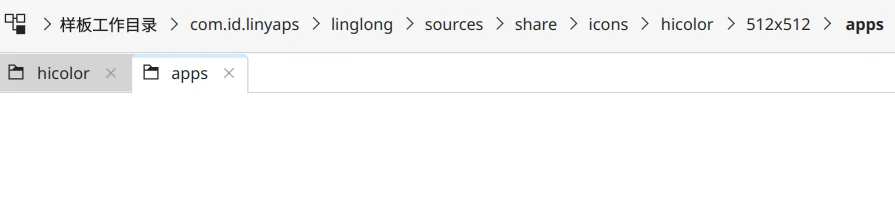
Then we rename the found icon to Add the suffix to the name followed by the Icon you set in the desktop file That's it. I changed it to motrix.png here. The final copy is as follows: 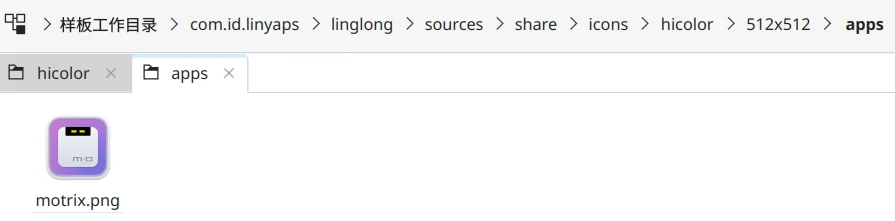
So the placement of desktop shortcuts and application icons is complete.
PS: Many appimage applications will directly give you an entire icons folder under usr/share, then Open it and see the name of its icon clearly and copy it directly to the corresponding path of the working directory. Just change it~
6. Build and debug the application
Finally the exciting construction phase has arrived! Let us return to the working directory, That is the folder where linglong.yaml is located
Then open the terminal and enter the following content and press Enter
ll-builder build
My running situation here is as follows:
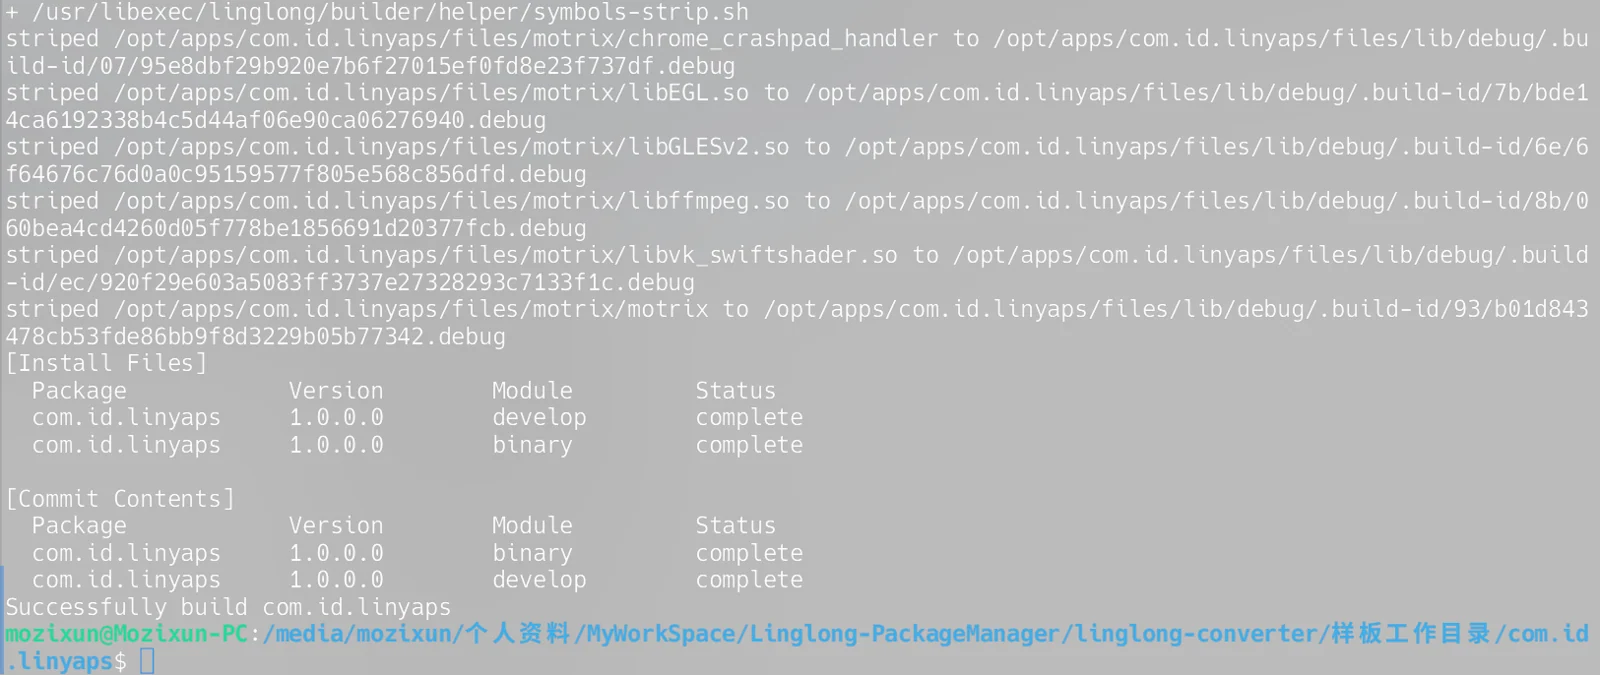
Note: If an error is reported here that the so binary library file is missing, then go to pkgs.org or After downloading the corresponding installation package from https://www.debian.org/distrib/packages#search_contents and unpacking it, Then put the so file into the linglong/sources/libs folder of the working directory, then re-execute ll-builder build and check whether there are any required so files. If you still need to, repeat the above operation or use Linyaps killer in an advanced way.
Actually, I haven’t used Linyaps killer yet.
Finally, we perform debugging and running ( Prevent applications from requiring additional function libraries ), that is, enter the following content in the terminal and press Enter
ll-builder run
Then we will see the interface appear
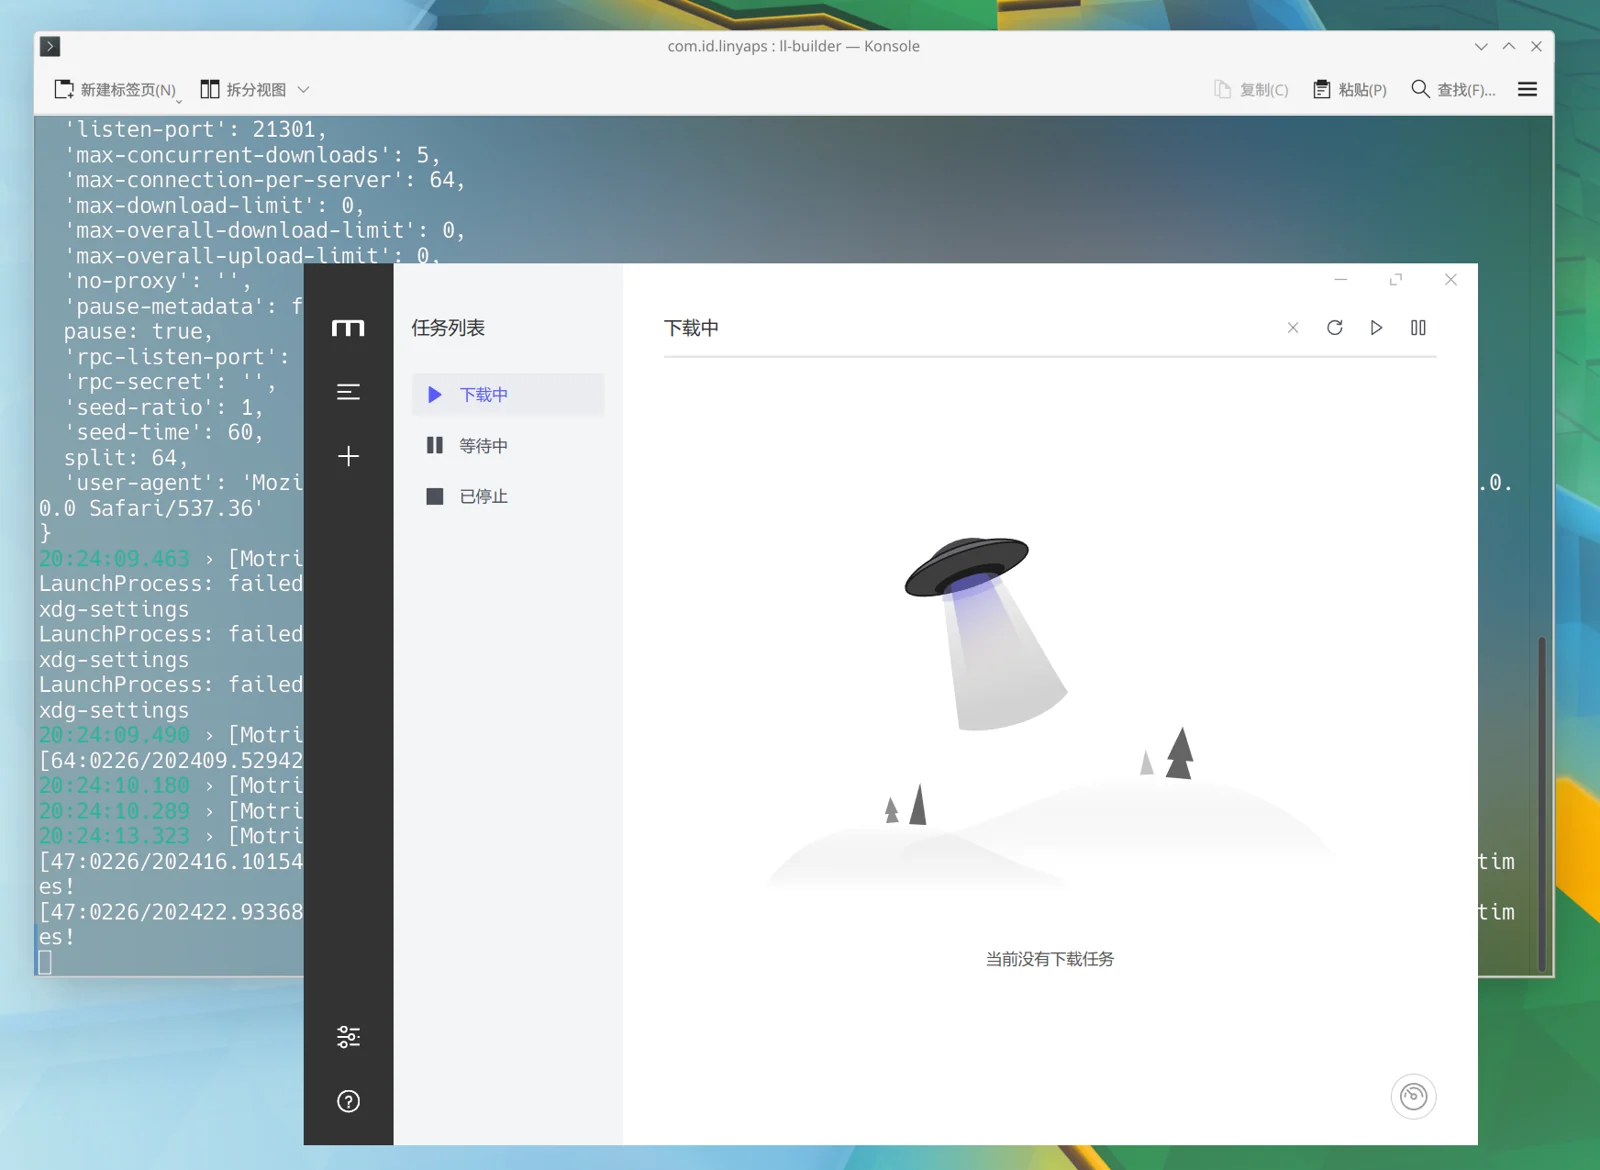
Tip: Since org.deepin.base is missing the xdg-open and systemd-run files, Therefore, not all applications can be opened normally when opened in a folder or in the built-in browser. , if you need these two, you will find that there is no response:
If you encounter this problem, download this Compressed package >>>
Then overwrite bin and libs in the original folder to solve the problem
7. Export the layer installation package
Since exporting executable uab files is not supported in distributions other than deepin/UOS, And the exported file size will be huge (because it includes Runtime) , so I only provide tutorials on exporting installation packages
After passing the ll-builder run test, enter the following content in the terminal and press Enter
ll-builder export --layer
My output here is as follows: 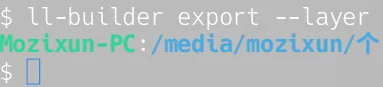
The workspace directory after exporting the installation package is as follows:
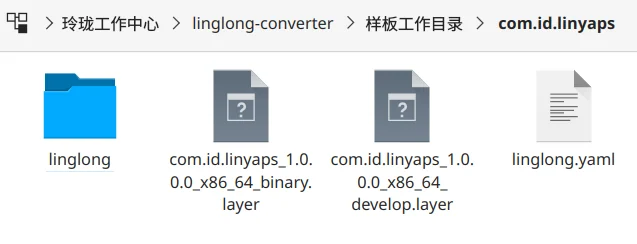
Then install the locally exported layer package. For example, open the terminal in the current folder and enter the following to complete the installation:

Then After checking, the desktop icons are displayed normally 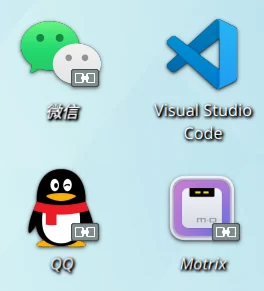
Then a sample Linyaps application has been successfully packaged. This tutorial ends. I hope this tutorial can better help you build a Linyaps package!
English edition: Linglong editorial · 18 October 2026. Original publication: 2025-02-27.